
Skype, with no doubt, is one of the most popular communication tools for free calls and chat. It allows you tostay in touch with your family and friends.You can also use it to organize conference calls. But sometimes, you may need to save important meetings or personal conversations for various reasons. If so, you should record your skype calls with a reliable recorder.
In this post, you will learn the most efficient solution to captureand edit calls on Skype.
Best Skype Recorder to Save Your Video/Voice Calls Easily
Perhaps you have tried the built-in recording feature of Skype. If you have, you must notice that there are multiple limitations. For example, the recording file only lasts on Skype for 30 days. And if you select the Start recording command,everyone in the meeting room will know that you’re recording the call. What’s more, this tool is not compatible with many browsers other than Google Chrome and Microsoft Edge.
Therefore, if youprefer recording Skype calls without limit, then you shouldn’t miss Vidmore Screen Recorder, the best alternative to the built-in Skype recording tool. No matter you are usingWindows PC or Mac, this recorder can make your skype recording much easier.
- Vidmore Screen Recorder can help you record Skype video calls smoothly and save the recorded videos in MP4, MOV, MKV, WMV, GIF, and more.
- It is able to record Skype audio calls from system soundand microphone with the original sound quality.
- The interface is quite simple and intuitive. Even if you are new to this, you can customize your recordings effortlessly.
- This software enables you to take screenshots and add real-time annotations during the recording process.
- You can preview and trim the recorded video as you like before saving the video to your computer.
- This recorder supports hotkeys that can control the process whenrecording Skype calls.
How to Use Vidmore Screen Recorder to Record Skype Calls?
Step 1. Download & Install the Software
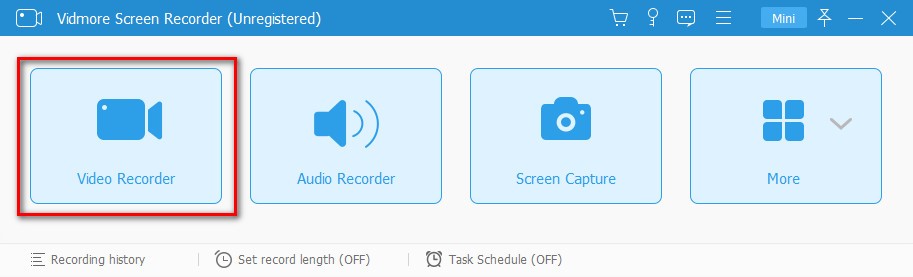
Download Vidmore Screen Recorder from its official website and install it on your computer. Then open it. You will see 4 big buttons in the window. If you want to record a Skype video call, select “Video Recorder”. But if you want to record a voice call, you should choose “Audio Recorder”. Here we’ll take video recording as an example.
Step 2. Adjust Recording Settings
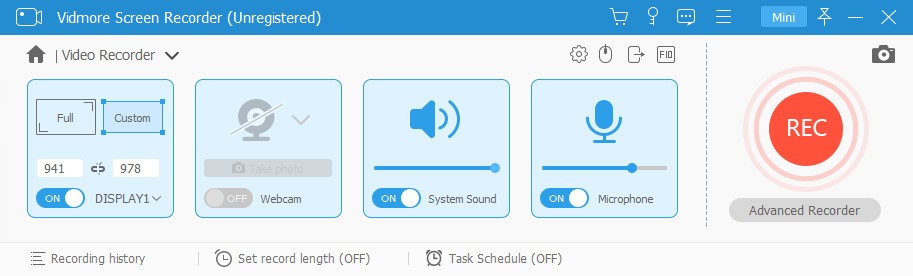
Then please select the “Custom” option and choose “Select region/window”. Now you can click on the interface of Skype to make sure only the Skype call is captured. After that, you can turn on “System Sound” and “Microphone”. As for the webcam, if you have or will enable webcam on Skype, there is no need to add a webcam on Vidmore Screen Recorder separately. Click “REC” to start your recording.
Step 3. Record Presentation
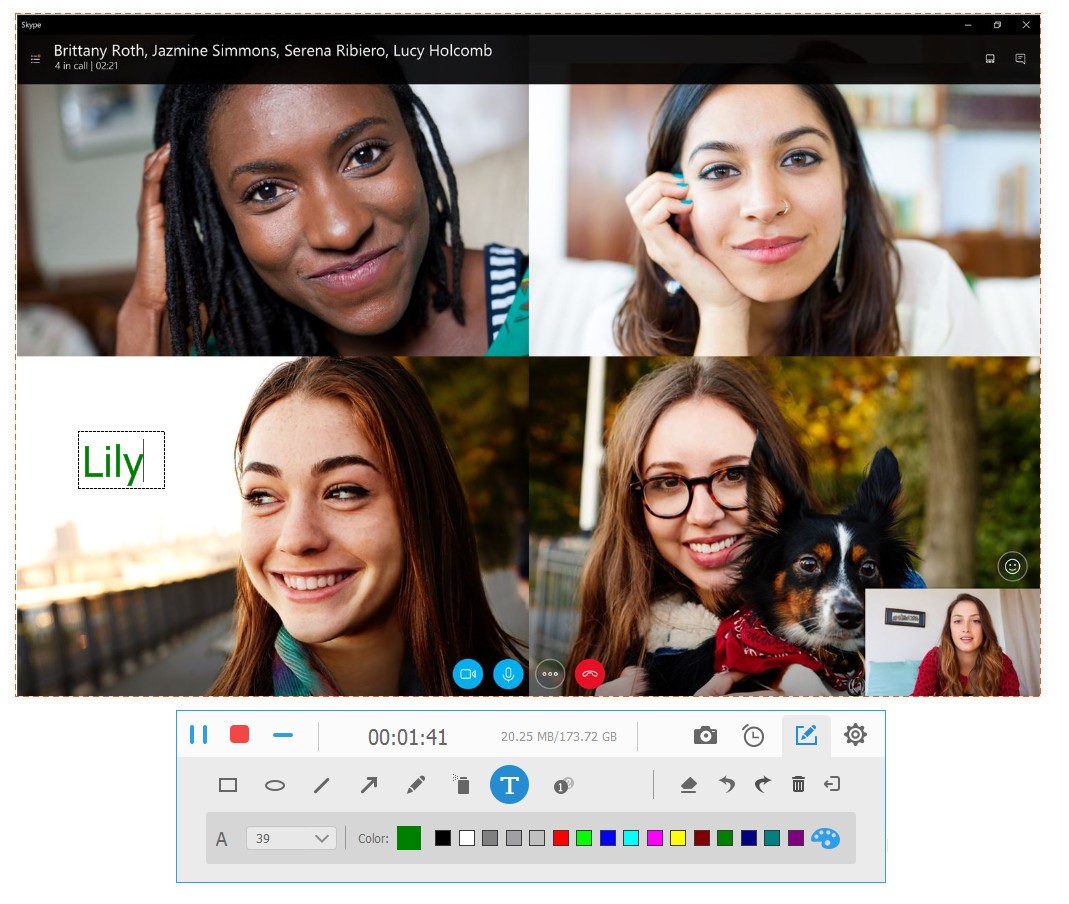
After clicking “REC”, you will see a control bar in the corner.During the recording, you are able to add text, line, arrow, and other marks to your video. don’t worry, this control bar won’t be recorded. When your call is over, click the “Stop” icon to end the recording.
Step 4. Save the Video
In the Preview window, you can trim your video by adjusting the “Start/End” pointer under the video. After removing the unwanted part from your video, please click “Save” to export the video to your computer.
With these 4 simple steps, recording Skype calls will never be a difficult thing. Besides recording your calls, it canalso be used to take screenshots and manage the recorded videos. In general, if you want to enjoy a better Skype recording experience, Vidmore Screen Recorder is absolutely your best choice.


Add Comment