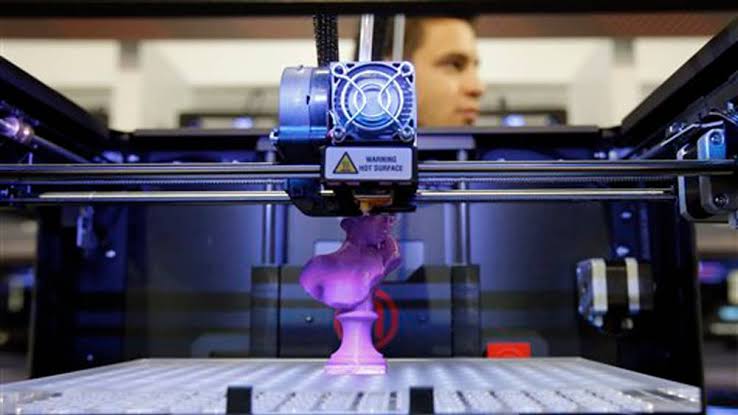
Continuing to adhere to the concept that doing it right with my own hands, I will describe the problems and pitfalls encountered on a difficult design path.
Why is it better to assemble a 3D printer with your own hands, and who needs it? Here the main question appears – the use of the printer. What is it for? If you need 3D Printer kit for artistic or architectural-sculptural creativity, including for creating replica models of something, then it might be better to find the money for a relatively expensive, factory-assembled machine. If you plan to use a 3D printer in robotics, then it makes sense to assemble it yourself, and there are several reasons for this.
Why assembling a 3D printer manually is always beneficial?
At first, a 3D printer, like a CNC machine, are robots, and by assembling such devices manually, the author can safely say that he is engaged in robotics and is building robots.
Secondly, manual assembly allows you to study the principles of operation and construction technology of the device, to understand the purpose of each part.
Thirdly, having understood the purpose of each part, it’s easier to understand the print settings, which are not so simple for a beginner.
Well, and fourthly knowing the design of a specific printer thoroughly during assembly, adjusted it, achieved satisfactory printing results, examined various printer designs on the Internet, a person understands that some things in the design of an assembled device could be changed, improved, remade in their way. Check out Pick3DPrinter’s list of the Best High Resolution 3D Printers.
Therefore, my concept is that initially, it is better to assemble the printer from the KIT-set, because for a start, it is easier to work if there are instructions, tips from colleagues who have already gone this way. And having already dealt with everything, literally, and not in a figurative sense, having touched every detail, one can not only proudly say that “every screw is familiar to me in it,” but also boldly undertake the construction of its version of the design.
Since I already wrote a guide for assembling a 3D printer from the DROVA MC5 kit at the end of last year and I hope that the review, which has been going on for 3 months, will someday be completed, and the instruction supplemented by several dozen photographs and drawing will be released, so far I will focus only on a few points.
The impressions of the assembly and connections of such a printer, so will only post my vision of solving technical problems.
The first rule of assembling a 3D printer is parallelism and perpendicularity, but during laser processing of plywood, the cut does not turn out to be even. In the upper part, it is wider, therefore, if the side projection of the part is not rectangular, but trapezoidal. This must be dealt with, right up to the installation of gaskets.
It is better to put the missing rubber bushings, for example, cut from something suitable in size, for example, from silicone bushings from a CD-ROM.
What they propose to install instead of the coupling is no good. You can install a standard coupling.
But it is not without drawbacks since in this design of the printer zero is determined by the fact that the nozzle abuts against the table, then stretching and compressing the clutch spring adds errors. In addition, it must be specially purchased. I installed a piece of the fuel hose, compensating for the difference in diameters by screwing a threaded rivet, which was bundled instead of the sleeve and the winding.
It’s better to install radiators on engine drivers, and they weren’t included in the kit, sawed from the radiator from the motherboard chipset and glued it with hot glue
It is better not to use the slicer settings from the manufacturer’s website, and there is an auto-level for 5 points. With this setting and a poorly adjusted level of the table, or weak springs of its fastening, zero will not be detected correctly, and movement during printing up and down along the Z-axis will lead to lightning-fast wear of the threaded shaft and nut. It’s better to adjust the table correctly and create your default setting immediately.
Z-axis limit switch assembly design created under the switch without pressure plate. While thinking about what to do with it, the nut of this unit was worn out, despite the lubrication. Therefore, the unit has been redone. A mortise nut was installed in a cube of 2 pieces of 10 mm plywood, and the limit switch was installed at the desired height. After that, 1.5kg of the 3d printing filament was already spent, the unit worked flawlessly, zero stopped “floating.”
The combined cooling of the extruder and the printing area is no good, it is better to separate it. The fact is that when printing when the feed speed of the bar decreases, the melt area can increase significantly, which will lead to a stop feed. Therefore, the radiator cooling must be connected constantly from 12 volts, and the cooling of the print area to the controlled fan contacts. I used a standard diffuser from the extruder radiator, but if it weren’t at hand, I would draw it and print it the same way as I did the cooler diffuser of the print area.
A few more useful things to improve your printer.
Box for the board with a cooling fan. It was one of the first to be drawn and printed, so the unevenness of the walls is visible. This happened because the edges of the printing model “pull” when it cools and tears off the table.
Currently, 8 types of adhesive tape glued to the table have been tested, and the problem is solved. Oddly enough, the expensive 3M blue adhesive tape lost in comparison to the cheaper brown GT-ITAPE, also purchased in the painting department of the auto parts store.
For the bar to unwind from the coil, he made rollers.
I tried to recall the main problem points during the assembly, but if I have questions about the design and operation, I will try to answer, and I hope that my manual will be published soon.
Interestingly, one of my colleagues who helped me build the printer decided to make a printer for myself from scratch, which was successfully implemented.


Add Comment